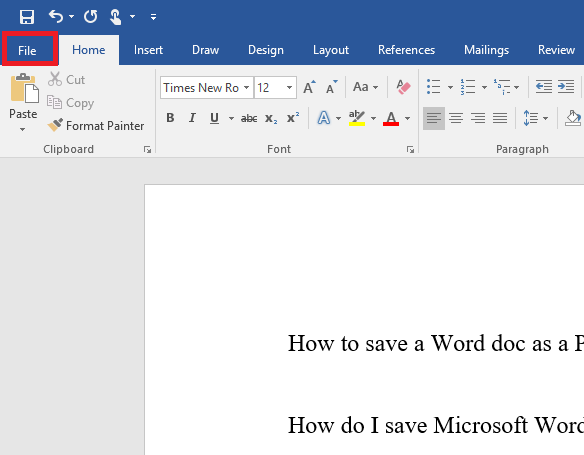
- Click the File tab in the top-left corner of your Word screen.
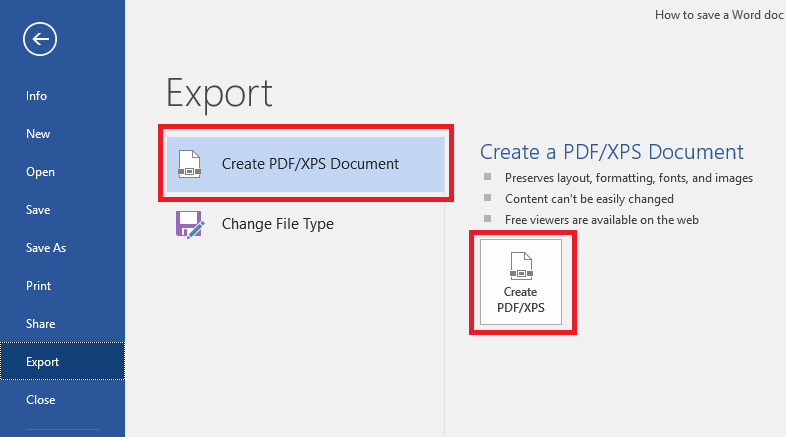
- Click Export in the blue vertical menu that runs along the left side of your screen.

- With the Create XPS/PDF Document option
selected, click the corresponding box on the right side of your screen.
(It looks like a document icon wearing a seatbelt.)
- A new box labeled Publish as PDF or XPS appears, and you should use it to navigate to the location on your PC where you want to save the new PDF.
- Click Publish to create and save your PDF.

- You may see a How do you want to open this file? pop-up box. By default, Windows will use the Edge browser but you can choose from other compatible browser apps installed on your PC, as well.
- If you want to continue using the same app to open PDFs in the future, check the Always use this app to open .pdf files option.
How to save a Microsoft Word doc in different file formats
- Follow Steps No. 1 and No. 2 above.
- Highlight the Change File Type option on the left side of the screen.
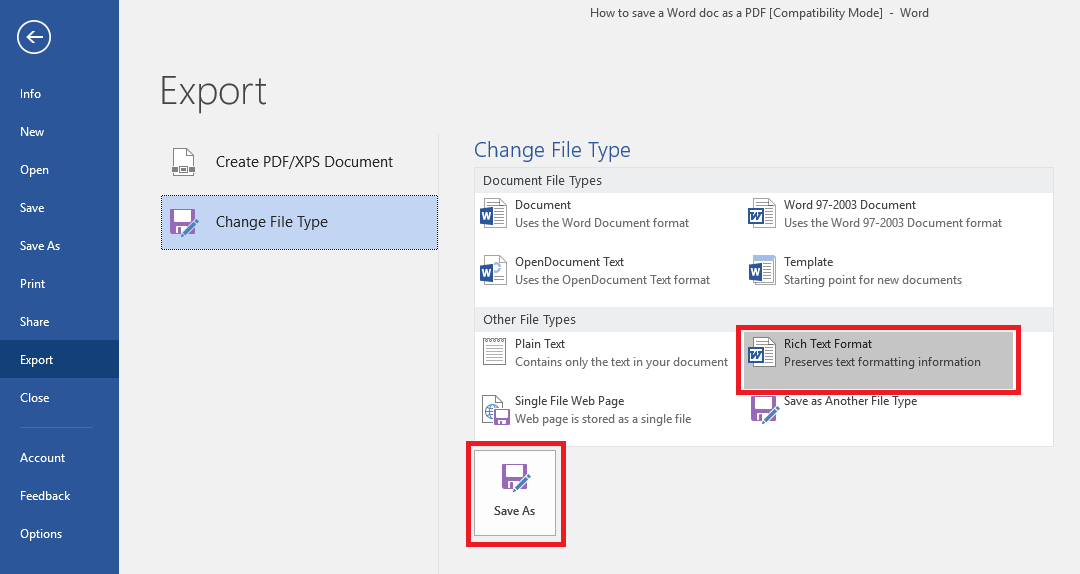
- You'll see a number of different present options for new file
formats, including OpenDocument Text, Word 97-2003 Document, Plain Text
and Rich Text Format.
- If you want to use one of the default options, choose and click it accordingly and then hit the Save As box at the bottom of the screen.
- Next, navigate to the location on your PC where you want to save the new file and click Save.
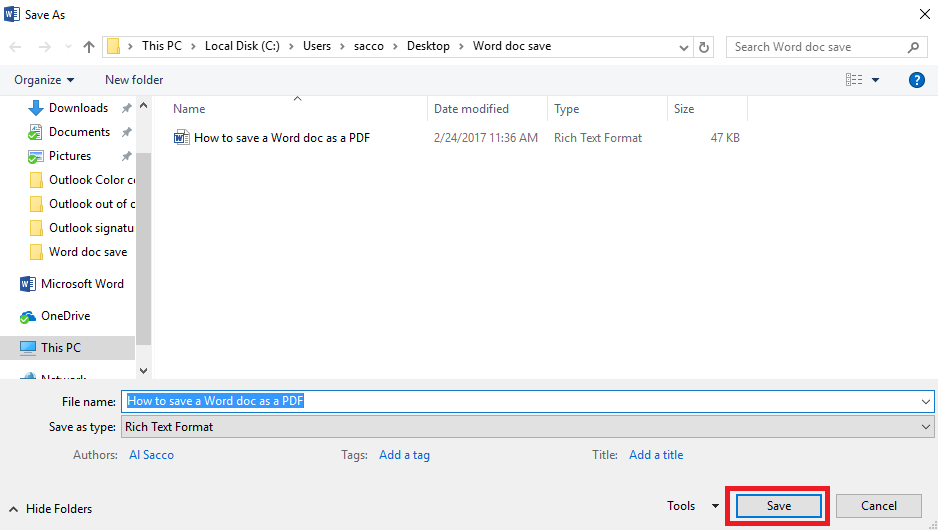
- If you want to save your Word doc in a format that's not available in Word's preset defaults, complete Steps No. 1 and No. 2 above, and then choose Save as Another File Type
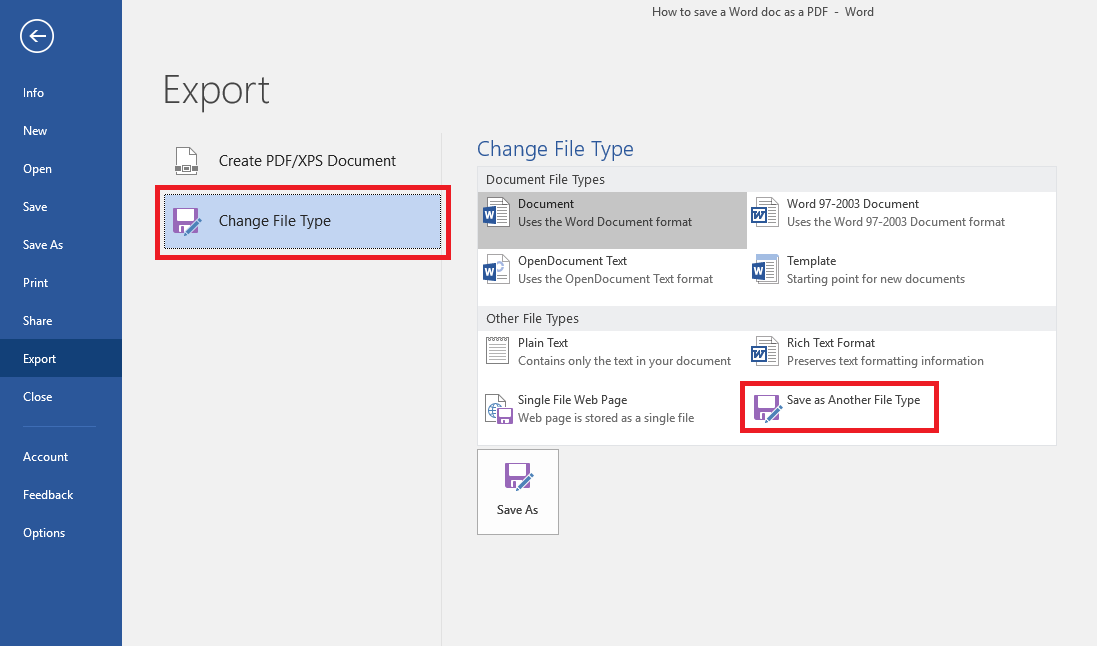
- Click the Save As box at the bottom of the screen.
- In the next box, navigate to the location on your PC where you want to save the new file.
- Open the drop-down menu next to Save as type to see a few additional options, such as Word XML Document, Strict Open XML document, and Web Page, Filtered.
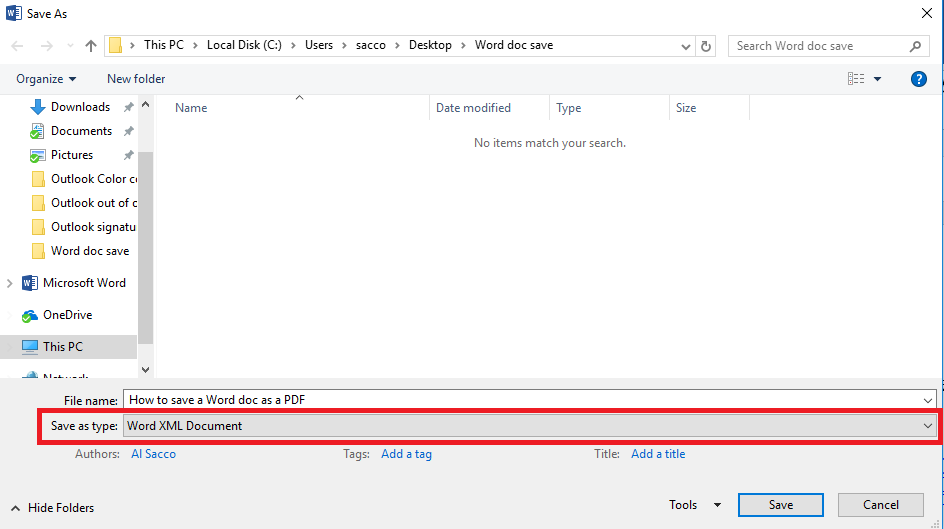
- Choose the format you want and click Save.
